


.JPG)


.JPG)


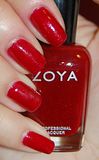


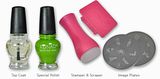
Image plate M57
Purple, Creme nail polish
I will pick a corresponding color for the stamp. I hope to get the mani up before the end of the week, so be looking out for that!
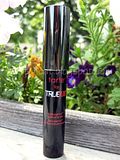
Next up, I will be doing a product review on a Hana Salon mini ceramic Flat Iron. I know it's not "nails" related, but I REALLY wanted to try this product out. I already have a pretty good flat iron, so I am anxious to try it against this one, which is supposed to be pretty good. Plus it is a mini and travel size, so how awesome is that? I have to thank the WONDERFUL Lisa Cocuzza of It's A Glam Thing for making this possible! I read a couple of the reviews already up on this iron, and I must confess I have my expectations up fairly high on this one.


I have some disappointing news on my Orly Satins I ordered from Ebay. I rec'd the white one in the mail in just a couple of days. However when I got it, I realized it wasn't really "white", it is just kind of sheer - FAIL!!


 Look at how sheer this is!! I even painted one nail, and it was still sheer after four coats - boo!
Then to make matters worse, the yellow one I was most excited about:
 Never came! So yesterday I finally contacted the seller, and after two emails from me, they finally responded saying they "ran out" of the yellow one. Did I want another color or my money back! WTF!! No! I want the yellow one! Didn't one of you guys (EDIT LOLA5375) tell me you ordered the yellow one too? Did you get yours? This is the second time that something like this has happened to me on ebay. Does this happen alot?
So anyway, I picked this red one:
LASTLY - I wanted to say a BIG thank you to all who left me info on the mystery of my hands. I really appreciate all the info. you all left for me and I have been spending most of the day researching and checking out the links I was given. I really, really appreciate it all so much!


 The second item is Be Silky Callus Spray softener w/ Tea Tree Oil (


